How to Turn a Picture Into a Tattoo: A Step-by-Step Guide
Learn how to turn a photo into a tattoo design: choose a photo that works, pick a style, size it for your body, make a stencil, and brief your artist.
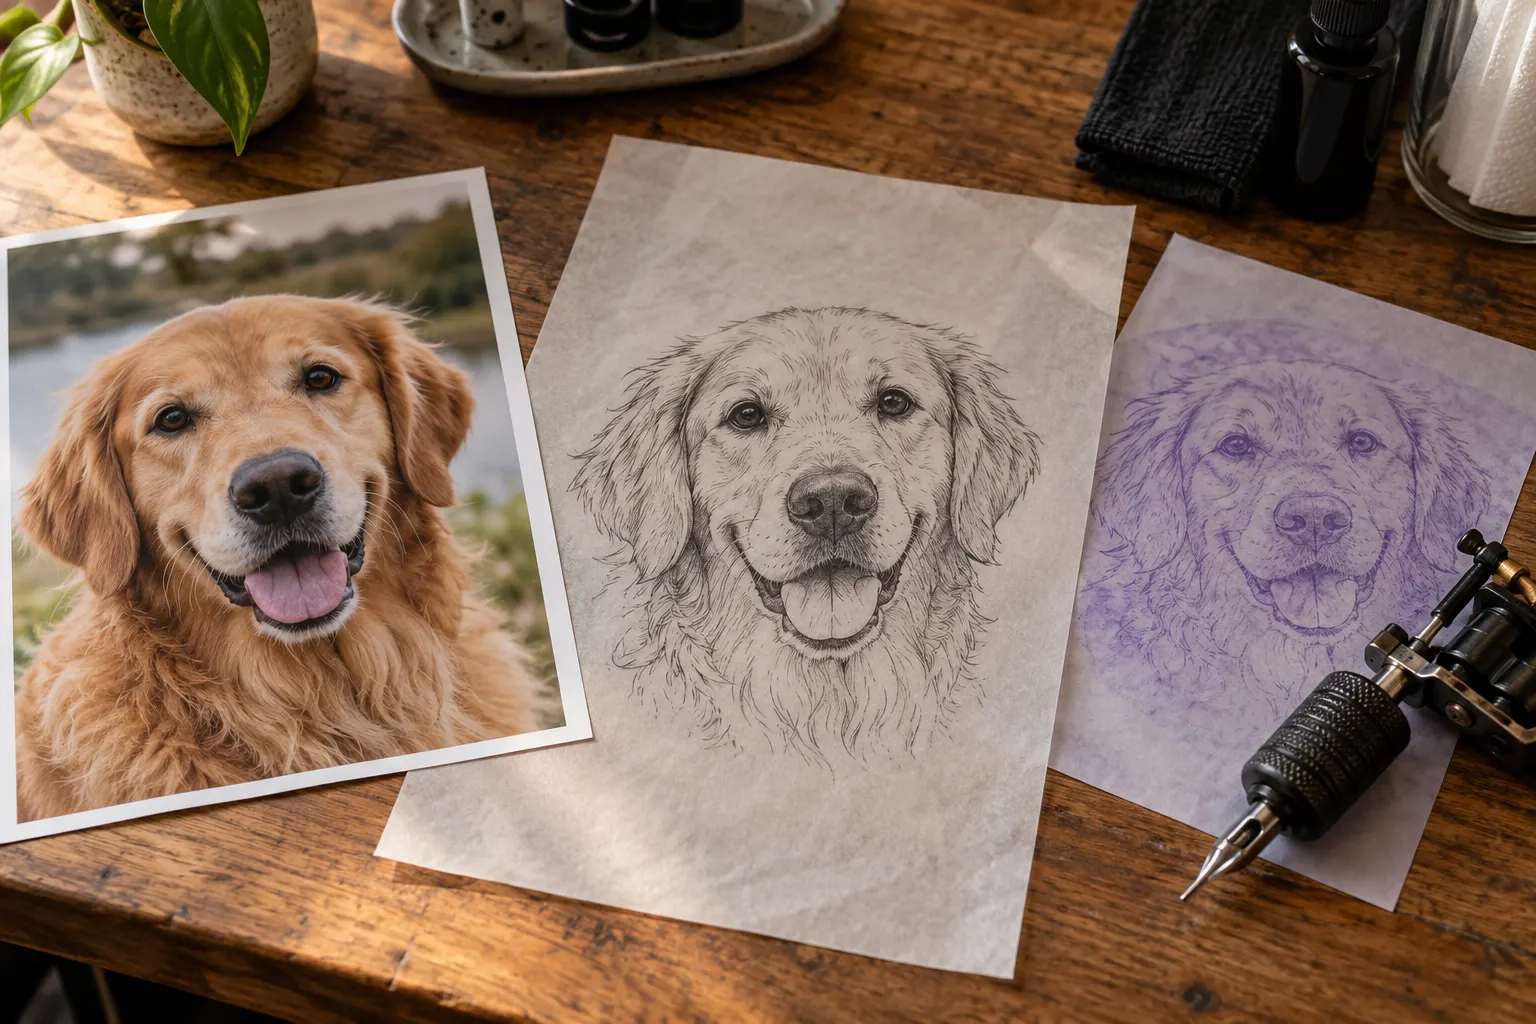
You can turn almost any meaningful picture into a tattoo: a pet, a parent's handwriting, a place, a child's drawing. But a photo isn't a tattoo design yet. Skin isn't paper, and ink spreads a little as the years go by. A good photo-to-tattoo design keeps what makes the picture special and leaves out the detail the skin can't hold.
The short answer:
- Pick a sharp, well-lit photo where the subject fills the frame.
- Decide what matters most and crop or simplify everything else.
- Choose a tattoo style that suits the photo and the size you want.
- Turn the photo into a design with an artist, an AI converter, or by tracing.
- Make a stencil and preview the size and placement on your body.
- Bring the original photo and your concept to a tattoo artist, who redraws it for skin.
The rest of this guide walks through each step, with examples and the mistakes worth avoiding.
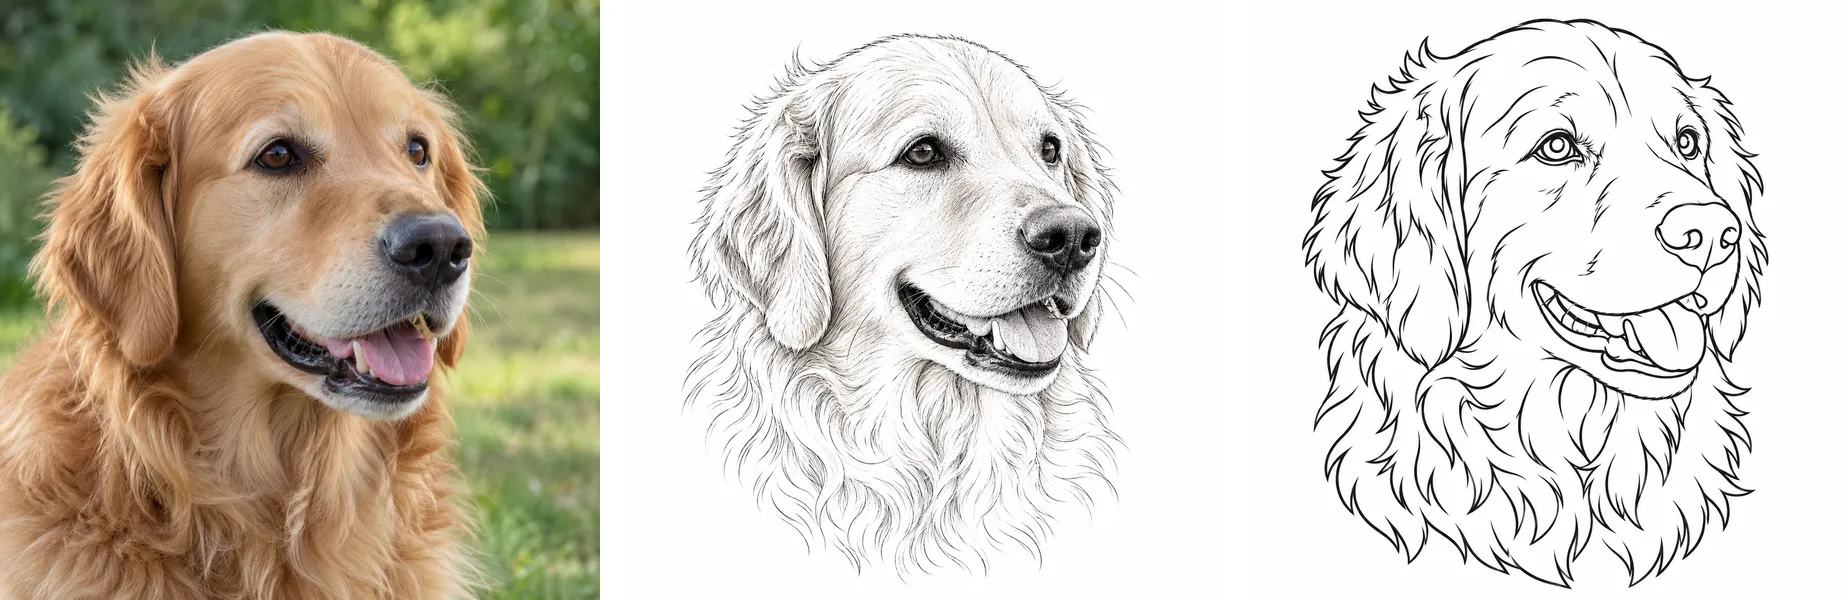
From left to right: the source photo, a fine-line tattoo design, and a stencil outline. The example images in this guide are AI-generated illustrations made for this article.
Step 1: Choose a photo that will actually work
The photo you start with sets the limit on what the design can be. Before you think about style, check the picture against this list:
- Sharp focus where it matters. For people and animals, the eyes have to be sharp. A blurry face can't be "fixed" into a likeness later.
- Soft, even light. Overcast daylight or window light shows the shape of a face clearly. Harsh flash, strong backlight, and deep shadows hide the features an artist needs.
- The subject fills the frame. A face that takes up a small corner of a group photo usually doesn't have enough real detail to work from.
- A simple background. Clutter behind the subject makes it harder to see its outline.
- The original file. Use the photo itself, not a screenshot, a social media copy, or a version with filters. Compression and beauty filters erase detail.
If you have several photos of the same person or pet, bring all of them. One can show the eyes clearly and another the ear shape. An artist can combine the best parts of each.
Photos that struggle: tiny faces from distant shots, extreme angles (looking up a nose or down from directly above), motion blur, and low-light phone photos with heavy grain. They aren't impossible, but expect a looser, more interpretive design rather than a close likeness.
Step 2: Decide what to keep and what to let go
A photo records everything in front of the lens. A tattoo should say one thing clearly. Ask yourself what this picture is about:
- Is it the expression, such as your dog's head tilt or your grandmother's smile?
- Is it the outline: a skyline, a mountain ridge, the shape of a hand?
- Is it the moment, such as a wave at a specific beach?
Then crop and simplify around that answer. Backgrounds can usually go. Collars, glasses, and jewelry are worth keeping only if they mean something. Fine texture like individual hairs, fabric weave, or leaves can be suggested with a few lines instead of copied.
This step matters more than any software. A design built around one clear idea will still read clearly ten years from now, from across the room.
Step 3: Pick a tattoo style that suits the picture
The same photo can become very different tattoos. Here is how common styles treat a photo-based design:
| Style | What it keeps from the photo | Works best for | Things to know |
|---|---|---|---|
| Fine line | Outline and key features with delicate linework | Pets, faces, florals, small keepsakes | Very thin lines need enough size and spacing to age well |
| Black and grey realism | Light, shadow, and likeness | Portraits and memorials | Needs a larger area and an artist who specializes in realism |
| Neo-traditional | A recognizable subject, stylized with bold lines and color | Pets, animals, objects with personality | Less photographic, but holds up well over time |
| Minimal line art | A single silhouette or contour | Hands, profiles, landscapes, symbols | Likeness comes from the shape, not the detail |
| Blackwork / illustrative | Graphic shapes and high contrast | Places, objects, bold subjects | Strong readability; fine detail is translated into pattern |
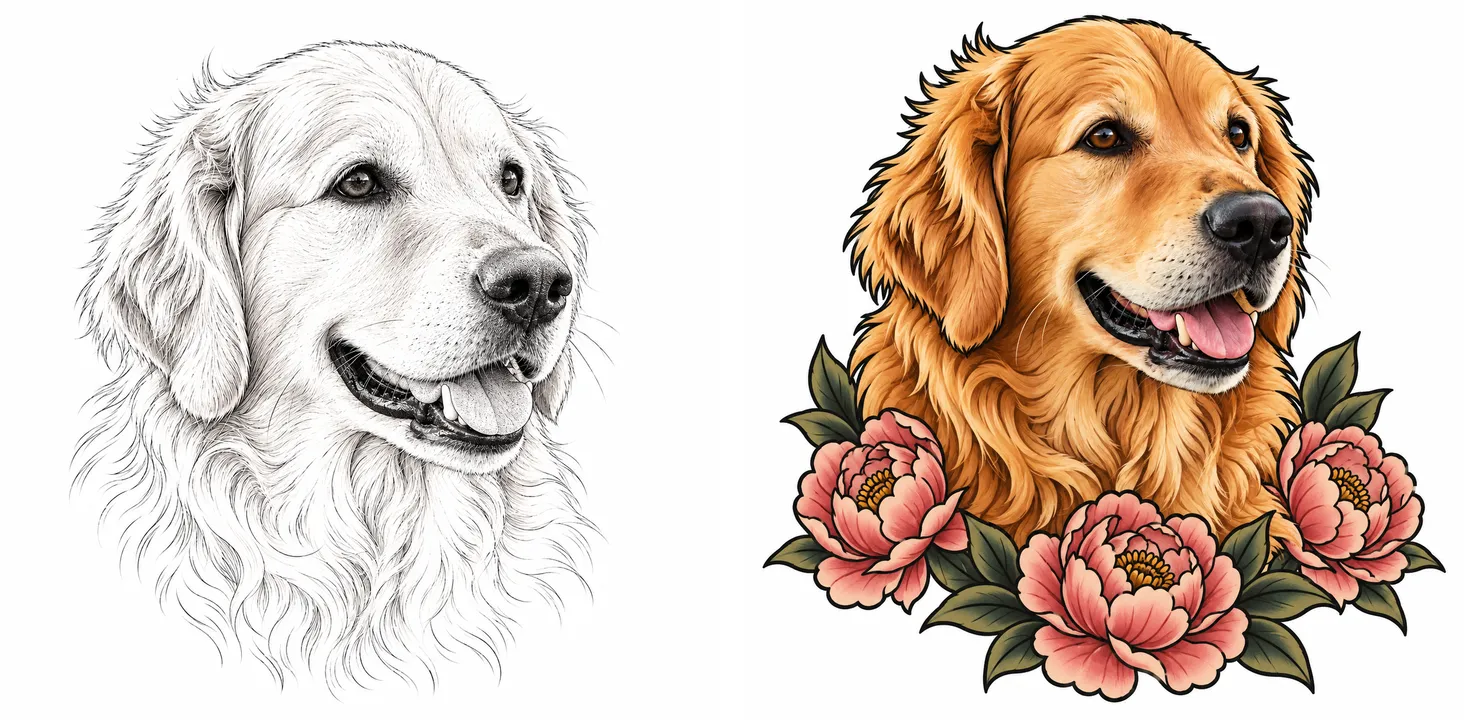
One photo, two directions: fine line keeps the likeness delicate and open, while neo-traditional trades photographic detail for bold outlines and color that read from a distance.
If you're unsure, generate or sketch two or three directions from the same photo and compare them side by side. Seeing your own subject in different styles makes the choice much easier than browsing other people's tattoos.
Step 4: Plan the size and placement before you finalize the design
Detail and size go together. The more realistic you want the result, the more skin it needs. Lines placed too close together tend to blur as a tattoo ages, so a detailed portrait shrunk to fit a wrist often turns into a dark smudge over time.
A few practical rules:
- Decide the placement first, then the level of detail. A forearm, calf, or upper arm gives a portrait room to breathe. A finger or inner wrist is better suited to a simple outline.
- Match the shape of the design to the body part. Tall designs fit forearms and calves; wide designs fit the chest, collarbone, or upper back.
- Ask your artist for the minimum size they would recommend for your design and style. Artists see how their own work heals and ages.
You can test this at home before you book anything. Put your design into a virtual tattoo try-on and adjust the size, rotation, and opacity on a body template to see whether it reads at the scale you have in mind.
Step 5: Turn the photo into a tattoo design
There are three common ways to get from a photo to a design. Many people combine them.
Option A: Ask a tattoo artist to draw it
This is the traditional route, and still the best one for a finished piece. Send the artist your photos and a few notes about style, size, and placement. Most artists will draw a custom design for you as part of the booking. Look through their portfolio first, and choose someone who already does the style you want, especially for realism and portraits.
Option B: Use an AI photo-to-tattoo converter for concepts
AI tools can turn a photo into several tattoo-style concepts in a minute, which is ideal for exploring directions before you talk to an artist. With the TattooIdeas Image to Tattoo converter, you upload a photo, choose a style, placement, color, and level of detail, and get a tattoo-ready concept you can download. New accounts receive free welcome credits, so you can try a couple of directions before deciding anything.
Treat AI output as a visual brief, not a final stencil. It shows your artist the look you're after, and they will still redraw the lines so they work on skin and age well.
Option C: Trace it yourself
If you like to draw, place tracing paper (or a drawing app layer) over a printed photo and trace only the lines that carry the image: the main outline, the eyes, the shapes that make the subject recognizable. Leave out shading at first. A simple traced line drawing makes a great reference to discuss with your artist, even if they redraw it.
Step 6: Make a stencil from the design
A stencil is the outline your artist transfers onto your skin before tattooing. It's usually printed in purple on special thermal paper. It contains only clean lines, with no shading, because shading is built up with the needle.
If you already have a design and want to see how it simplifies into linework, the Tattoo to Stencil tool converts a design or photo into black-and-white outlines you can print and discuss with your artist. Your artist will typically make the final stencil themselves at the exact size for your placement.
Step 7: Bring it to your tattoo artist
To get the most out of your consultation, bring:
- The original photo or photos, at full resolution.
- Your concept or sketch, whether it came from an AI converter, a tracing, or a reference you love.
- Notes on placement and size, plus screenshots from your try-on test.
- What you want to keep no matter what, such as the eyes, a date, or a specific detail.
Be open to the artist's changes. They will adjust line weights, spacing, and contrast so the design heals well on your skin tone and placement. That's exactly the expertise you are paying for.
A note on using other people's photos and art
Your own photos are yours to use. Be more careful with other images:
- Photos taken by a professional photographer are usually protected by copyright. Ask the photographer before turning their image into a tattoo, especially a recognizable portrait.
- Another artist's tattoo or illustration shouldn't be copied line for line. Use it as inspiration, and let your artist create something original.
- Photos of other people deserve their permission, particularly for portrait tattoos.
Common mistakes to avoid
- Starting from a low-quality photo and expecting the design to add detail that was never there.
- Keeping everything in the picture. Backgrounds, extra people, and tiny objects make a tattoo harder to read.
- Going too small for the style. Realistic detail needs space; scale the style down instead of shrinking the design.
- Skipping the preview. A quick try-on often shows that a design should be larger, smaller, or rotated.
- Treating any digital design as final. Your artist should always adapt it for skin.
Frequently asked questions
Can any picture be turned into a tattoo?
Almost any picture can be turned into some kind of tattoo, but not every picture can become a close realistic likeness. Sharp, well-lit photos where the subject fills the frame give you the most options. Blurry or distant photos usually work better as a simplified line or silhouette design.
Can a tattoo artist tattoo directly from a photo?
Artists work from photos all the time, but they don't tattoo a photo directly. They first turn it into a design and a stencil suited to skin, size, and placement. Bringing a clear photo, plus a concept of the style you want, makes that process faster and the result closer to what you imagine.
Is it free to turn a photo into a tattoo design?
Tracing a photo yourself is free. Most tattoo artists include the design in the price of the tattoo. AI converters usually let you try a few designs free before charging; on TattooIdeas, new accounts receive welcome credits for their first generations.
What size should a photo-based tattoo be?
It depends on the style and the level of detail. Simple line art can be small, while realistic portraits generally need a forearm-, calf-, or upper-arm-sized area to stay clear over time. Your artist can recommend a minimum size for your specific design.
How do I turn a picture into a tattoo stencil?
Simplify the design into clean outlines without shading, then print it on thermal stencil paper at the final size. A stencil converter can help you preview the linework, but your artist will usually prepare the final stencil at the right size for your placement.